This is the first attempt, as you can see we added two more images other than the galaxy image, this is to further our knowledge.
video by Rebecca
Once we had got rid of the green screen and the galaxy background is visible, we made sure that everything was correct and looked effect so that when we played it back, it looked good.

Using the upper middle screen locate the ‘Chroma Key’ controls by clicking the down (expand) arrow. Select the eyedropper tool and select the darkest part of the green screen.the next thing we did was to go to the effect control and use the 'key colour' tool to get rid of the green matte colour in order for a succession of the galazy image to look subtle and effetcive. We toggled with the 'Choke', 'Contrast' and the other necessary controls that made the green fade and ultimately rid itself of the colour. We went to the effects controls tab and typed in the search bar ‘Chroma Key’ or alternatively find it under ‘Video Effects’ – ‘Keying’ – ‘Chroma Key’. Drag the ‘Chroma Key’ effect into video 2 in which the green screen is located.

We then found an image online of and placed that in Video 1 so that it would overlay onto the Green Screen that will be removed once the image overlaps it. We then had to resize the image to make sure that it fit to scale in order for it to look effective.
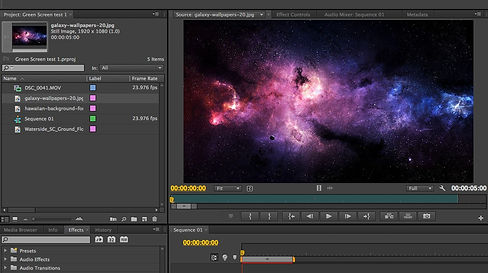

We imported the video into Premiere Pro and then tweaked the length in order to get it to the right place at the start and end. We then placed the video in the Video 2 slot, this is to make sure that the video is placed in the area I would like to work on.
As part of our skills development for A2 Media, our teacher asked us to undergo several tasks to further our knowledge, so that we can see the change from AS to A2.
One of the tasks is Green Screen, this is basically where you have a green material and you hang it on a flat surface in order to get no creases, and then you just record the specific thing you want, then you change the colour from green to black when editing to get rid of the green colour.
Firstly, we recorded Rebecca doing two sets of rotations and once we had finished recording, we then decided to edit the video. The software we used was Premiere Pro CS6 as it was a software we didn't use a lot in AS, so we thought it would be a good idea to try something new and develop our knowledge.